New Cities

empty city


Each player can only have 26 cities so you need to choose you new cities location carefully. Cities with 6 farmlands might be useful at the beginning but you probably already realized that the quickly become obsolete since a 15c produces 150% more food than a 6c and there are plenty of farms to plunder for resources. 9c (9 farmland) are a good tradeoff between a 6c and 15c, they can hold a a medium sized army and have decent resources output, once they are built the way you want they can be use to feed resources to your 15c. 15 farmland cities (15c) are the best choice for supporting a large army.  Make sure that you pick a spot where you can get 2 oases for it. It may be tempting to build cities close to your existing cities and/or outside the cluster in the middle of the map, but without oases they will not be very productive. When selecting the spot for your new city make sure that both it and the oases you want are not being farmed by other players. Since you most likely will be unable to take 2 oases right after building your city, make sure that you plunder often the cities with the oases to show that they are your farms.

City Tutorial

Lobbyist vs. Pioneers

dong zhuo city


To build a new city, there is 2 options. Lobbyists will allow you to get a city with buildings already built but they are expensive and slow to use. Pioneers are cheap and easy to use, but you must build the city from scratch. Both methods require demolishers (unless you go with an unoccupied spot). For the Lobbyist  you need to demolish the annex and be sure you are not trying to lobby the main.

One of the advantage to use pioneers for your new cities, is that since you rebuild the city from scratch your city will have the layout you are use too. If you prefer a certain buildings placement in your cities pioneers might be the way to go. With the lobbyist you will end up with your opponent layout which is probably a layout that you are not used so it might be annoying. Use the View Cities menu to manage your cities and it uses the construction date of the city to determine its place in the list, with the newest being at the bottom. when you lobby it, it might have been built long before your other cities and be placed anywhere in the list. Once the location is picked out, send your demos/rams to take out everything in the sub-city, destroying it and creating an empty space for your pioneers. If you do not have demos, ask your league leader for help.

Check out my previous article about lobbyist and pioneers :

Using Lobbyist for attack

Tip and Tactic when using Lobbyist

Lobbyist Train

If you haven’t read it go check out the last post about Gold.

Sometime some league mate ask me what to do with the extra gold left gold or if they don’t have enough for the metal alchemy scroll there always other option. Here my top 4 and a bonus if you want more food.

1-Garrison

camp-army

This is probably the single most efficient use of gold now. For about $15 (400g), you will get 120k f/h of storage space. Even just 44g will get you 30k f/h of storage space. It is easier and cheaper to increase your food output through the use of Garrison versus the Capital Outpost. If you are ever thinking of using some gold, this is the first place I recommend you spend some of it on.

2-Capital Outpost

coalittion

This is another good way to increase your food output, since it gives you a second city that can have resource fields above level 10. Keep your eye out for events that reward you with Jade Globes for every gold that you spend since these are the best way to get Jade Globes. It doesn’t matter what you spend your gold on, you just need to spend it during the event. Using the gold to increase your Garrison capacity during one of these events is a good way to give you a double boost to your food output.

3-Emperor’s Order

throne

(50g/3 days, 99g/7 days, 399g/30 days) – This is a useful item for several reasons beyond the bonus to resource production. The Auto Transport functions allows you to set repeatable transport orders for your caravans as well as giving them a 100% movement speed increase. This is useful for getting resources to your other cities from those that do the plundering. The Auto Build function is nice if you have a lot of building that you need to get done. You can queue up to 20 buildings and as long as you have the resources, they will be built. All of the other features of an Emperor’s Order are nice, but it is these 2 that I find the most useful now.   

4-Recalling your fled Hero’s Summit epics

run wounded

This is something you shouldn’t use your gold on now since we get so many free Callback orders from the events. The 100g can be put to better use elsewhere. I’ve talk about it in the last post, some heroes you can live without it might be a good idea to recall them but if you are overflowing with food because you lost everything wait until you have no choice.

Other honorable mention for extra food production

Token of Rain (7 days) (26g)

Increase the Food output by 25% for 7 days, not available for State and County Capital.

Probably the cheapest non permanent way to increase your food output. 26 gold for 7 days is probably the best you can get, the Emperor order is 50 for 3 days (double the price for half the time…) and the Treasure Bowl is about the same price (29 gold) but only last 3 days.

Treasure Bowl (3 Days) 29g

increase all output by 25%

Another way to increase your food, it’s increase other resources output has well. Way shorter than the Token of Rain so if you just want the food bonus go with the token of rain.

I don’t think the token of rain and the Treasure Bowl bonus stack, if you know if they do let me know. The same go for the Emperor order with those two.

Rotation Order, Level 1 (3 days) (199g)

Reduce food consumption of your army by 5%, last for 3 days.   

The Rotation Order is way over price but it has a nice thing to it, it stack with other bonus since it’s not a food bonus but a reduction of your food consumption. But keep it mind you are paying 8 times the Token of rain price for 5 times less result.

We are doing a series of posts on FTL and  we hope you like them. If you want us to do more of this let us know in the comment or by mail at jack at onlinesgamestips.com

Master of Patience – Use only the Artillery Beam to destroy an enemy ship while taking no hull damage.

The Federaion Cruiser

This achievement is the easiest to get of the three. Just upgrade your shield to level 2 and when you fight a ship not using missile just wait for the artillery beam to do is job. You can even go grab a coffee if you want while your ship finish the enemies ship with the artillery beam

Diplomatic Immunity – While using the Federation Cruiser, use your crew in four special blue events by sector 5.

The Federaion Cruiser

Honestly this achievement is so hard to get. I’ll be brief and link to you a table in the wiki that show you all the event per alien species which will allow you to try to plan for this event.

The description of this achievement is rather vague, it is important that only blue event choices that arise as a result of having particular alien crew members aboard count towards this achievement – thus other blue event choices (for having specific system upgrades, augments, or weapons) do not count. Note that even if the event says “by sector 5” it’s actually, before entering sector 6, so the very last place you could conceivably get your final blue option in is the exit beacon for sector 5.

To increase your chance of receiving this achievement you get a Long-Ranged Scanners augment has soon has you can. Why ? Because the majority of blue event options for crew will be found within normal or distress beacons it will save you time to choose a beacon more likely to have a event. Another important point, it’s really important to diversify your crew, the layout A is probably the best for that part since its start with 4 different race. Zoltan are mostly found in Zoltan controlled world , Lanius can be a nice find to in the abandon sector and slug can be hired in their home nebula. You can get new members from slaver ship or by boarding and killing all the crew, you might find survivor that will join you in that case.

Has for the event per say here are the link to the list of all possible event per race: http://ftl.wikia.com/wiki/Diplomatic_Immunity

Artillery Mastery – Get to sector 5 with the Federation Cruiser without upgrading your weapons system.

The Federaion Cruiser

This achievement is actually not to hard to get. Upgrade a the artillery beam, shield, engine and try to supplement your ship with cloaking, hacking or Drone control with a defense drone. The last three is to dodge those nasty missiles. Just wait for your Artillery beam to take care of the rest. The layout  A can be a good ship to get that achievement since the Burst laser II can really help. You can’t upgrade your weapon but nothing prevent you from buying weapon either. Some bomb can be very useful to blast an annoying system (shield then switch to burst laser or blast the pilot or engine so they won’t be able to run away)

FTL: Federation Cruiser

We are doing a series of posts on FTL and  we hope you like them. If you want us to do more of this let us know in the comment or by mail at jack at onlinesgamestips.com

The Federation Cruisers are the only ships with the Artillery Beam.

The Artillery Beam’s path follows a specific algorithm. It finds the centers of two rooms and forms a path between them, with no limit on the length between them. It bypasses all shields and does one damage to each room hit.

Layout A

Federation Cruiser

Unlock

Defeat the Flagship Construction in the Rebel Stronghold sector to unlock this ship.
Alternatively defeat The Rebel Flagship with the Engi Cruiser

The main advantage that the federation ship has its  the Artillery Beam. This system is a weapon of is own that ignores shields and does a lot of damage. One build for this ship is to focus on beefing up the defenses (shields/engines) and let the beam it do the work. This needs patience, but is worth the wait. If possible, destroy the enemy’s missiles promptly (or get defense drones), as they bypass shields and pose a threat to the hull, cloaking can be an option too if you are playing the advance edition.  Hacking could be a good system too, hit the weapon system and wait for your artillery beam to take out the ship.

This layout start with a decent weapon, the Burst Laser II, so you don’t necessarily have to go the upgrade only the Artillery Beam route. You can work it with a teleporter since the starting crew (mantis + rockman) is good for boarding. Just be careful not letting the Artillery Beam kill your crew or destroy the ship whiles they are on it.

Bomb can goes well with the Artillery Beam, your Burst Laser II can take care of Zoltan shield, the bomb neutralizes system that might cause problem likes weapon if they have missile, piloting if they are trying to escape right away or hacking it they hack your shield, pilot, engine or artillery beam.

Layout B

Federation Cruiser

Unlock

Earning two of the three Federation Cruiser achievements will unlock layout B.

Layout B is very similar to layout A, they have the same module, 50 scrap more upgrade on the layout B and a smaller crew. The Dual lasers are less power full than the Burst Laser II but are very power efficient. The leto missile is useful but 1 damage is pretty low for a missile weapon, you might use them in the first few sector but you should try to either rely on the artillery beam instead like we explained for the layout A

Crew members of the layout B aren’t very useful for boarding so you might want to wither skip the teleport upgrade or hire better boarder along the way.

Layout C

Federation Cruiser

Unlock

Reaching Sector 8 with The Federation Cruiser B and Advanced Edition content enabled will unlock Layout C.
  • Default name: The Fregatidae
  • Starting Crew: 1 Human , 2 Zoltan , 1Mantis
  • Starting Weapons: None!
  • Starting Resources:
  • Unique Ability: Flak Artillery
  • Slots: 4 Weapon, 2 Drone (requires system)
  • Starting Augmentation:
    • Emergency Respirators

Layout C is quite different from the 2 other layout,  It has an Artillery Flak Gun instead of an Artillery Beam, which unfortunately don’t go through shield like Artillery Beam and can be dodge, but is very useful to shred a Zoltan super shield then teleport your crew on the enemies ship.

This ship is a boarding ship and the synergy of the Zoltan with the clone bay can have amazing effect. Warp zoltan on the other ship make them explode, your clone bay will bring your Zoltan back to life, send the mantis with a resurrected Zoltan to finish the job. You might want to upgrade the  Cloning Bay and the teleporter to Level 3, to maximize the effect of this tactic.

What can be annoying with this ship is other rebel ship that are charging their FTL drive right when the fight start. Since the only thing you got to attack is your boarding team and the artillery flask gun that take forever to charge, there always a good risk that they might run away with your crew on it and increase the rebel fleet progressing by on jump.

Note , that the Artillery Flak Gun lacks the shield-piercing capacities of the Artillery beam, meaning that it’s essentially a slower-cooldown or more power-hungry version of the Flak Gun II. This make this layout not viable to rely purely on Artillery, unlike Layouts A and B.

Gold

This is going to be the least important thing that I will be talking about so might as well get it out of the way since many players think that gold is an important factor. You don’t need gold to be a good player, but there are some small things that gold can do that will make things easier for you. alchemy scroll

Ancient Alchemy Scroll

This is the one thing that I recommend everyone to buy. It gives all your cities a 3% increase in food production and all the gold spent on it will be refunded after 3 months. Plus you will also get 80 gift vouchers.

caocaoliubeisunquan

Recalling your fled Hero’s Summit epics – If your epics have been killed, especially Cao Cao/Liu Bei/Sun Quan, I recommend spending the gold to call them back if you don’t have any callback order. It may seem like a lot but these heroes will help you with their +25% food production. Also the epics will allow you to duel more often in the faction camps so you can get items for Court Quests instead of spending gold to rank up. Double check if you can buy a callback order instead sometime they are cheaper than spending the gold directly.


search

Epic searches

This last thing is the most useful if you have never done it before. Getting epics from the career center will help you, but your main goal will be to get normal heroes that already got a “Bolus” to replace your existing heroes. What heroes with a “Bolus” mean,it mean it have a unlock skill book icon, will appear at the top of the list, and also cost double or quadruple resources to recruit. If they have a single skill book their first skill bar is open and if they have a double skill book they have 2 skill bars open. Once you equip them with Farm skill books these normal heroes can increase your production better than most epics, all without having to spend gold on Treasured/Purple Bolus. Any epics found while searching are nice, especially 2 and 3 star epics. I prefer to use the 10g search and find that if I have recruited my max number of normal heroes I have better luck finding Bolused normal heroes.

 cao cao governor comic

Since you have only a limited number of normal heroes you want to make sure that you make the most of the ones you have. Not all your cities need governors and if you don’t have epic heroes it will be better to keep most of your heroes together so you can duel with them easier and treat them with a nice banquet. Having your governors at level 100 will give your cities the best production bonus. If you have Epics or heroes with skillbooks that boost food production, you want to make sure that they are in the important cities with your governors. They do not have to be governor for you to get the bonus but only the highest bonus from a hero applies in a city.

So which cities should have governors?

A empty city is very easy to govern...

Your Main city obviously should always have a governor. If you have any County or State capitals they should also have a governor. Your capital outpost and any 15c should be good candidate because they will produce more food.

Other way to increase the output of your governor ?

Go in your civil and assign them to positions that increase their politics. Equip them with equipment that raise their level. Raise their level, add skillbook with the farm skill.

What equipment should your governor have ?

The basic minimum your governors should have is a Cloud helm and Welfare of the People equipped and are assigned positions that increase their politics. If you don’t have welfare of People in hand you can always use a Cloud enforced lance which usually increase politic too.

What skill and skill books make good governor ?

At level 50 some epic heroes get a farm skill that give up to 25% food output. Sun Quan, Liu Bei, Cao Cao and Zhou Yu all have a 25 % Farm bonus while Zhang Cheng (from the hermit house) have only a 9% bonus. You can give skill book that have the Farm skill, this will increase your output too. Note that the farm skill from the heroes level 50 bonus and the skillbook stack together but if 2 heroes have the heroes level 50 skill only the best bonus from both heroes will be taken, same thing go from skill book.

This is a follow up of the latest Nobility post, this one is mostly base on the in game guide.

Title Beyond Generalissimo

These are special titles. Only one title is available on each server. These titles are the ultimate honor in the world of Three Kingdoms.

Emperor

throne


Once a player has taken control of the Imperial Capital and 4 State Capitals, has more than 2,234,400 Contribution Value points, and the State Capital has opened for more than 30 days, then the player will be allowed to build an Imperial Palace in the Imperial Capital.  When the Palace reaches level 5, you will under attack by NPC troops every time when you upgrade it.  There will be a final wave of troops attacking when your Palace reaches level 20.  If you survive in these attacks, you will get the title of Emperor.

  • Bonus:
    • Recruiting speed in all cities increase by 20%
    • Every time you donate tokens to the court, you can earn extra 20 point of Contribution Value points
    • Attack and Defense value of troops is increased by 15%.

Prime Minister

 Cao Cao - prime minister

If you have 1,396,500 Contribution Value points or more, when you occupy the Imperial Capital, you will gain the title of Prime Minister. If lose control of the Imperial Capital, or one of your 2 State Capitals, you will lose the title as well.

Lord of Wei

cao cao governor comic

Player who occupies Pu-yang, the State Capital of Yan, and increase their Contribution Value to at least 1,396,500 to become the Lord of Wei.
Bonus: Attack and Defense value of troops increase by 15%.

Lord of Shu

liu bei meet zhu ge liang
Player who occupies Cheng-du, the State Capital of Yi, and increase their Contribution Value to at least 1,396,500 to become Lord of Shu.
Bonus: Attack and Defense value of troops increase by 15%.

Lord of Wu

sun ce


Player who occupies Jian-ye, the State Capital of Yang, and increase their Contribution Value to at least 1,396,500.
Bonus: Attack and Defense value of troops increase by 15%.

Lord of Qin

soldier post

The Lord of Qin is a noble rank which players can fight for once the server starts. The player with the highest Contribution Value over 2,234,400, will gain the title of Lord of Qin. This title will be re-calculated at 24:00 every Saturday, and will not change for a week.
Bonus: Attack and Defense value of troops increase by 15%.

Position for Heroes
You can appoint a office position for each hero of yours. The position can increase his status. There are 4 types of positions, each can increase one of their status. You must have certain nobility to appoint the corresponding position. Another request is your hero should reach a certain level.

The Engi Cruiser

Robotic Warfare – With the Engi Cruiser, have 3 drones functioning at the same time.

The Engi Cruiser first Achievement

Probably the easiest achievement of the game to obtain. Obtain three drones and activate all three of them to unlock this achievement. Repair drone and anti-drone drone work best since they only need one power.

I hardly lifted a finger – With the Engi Cruiser, destroy an enemy ship using only drones.

The Engi Cruiser second Achievement

This achievement can be done pretty quickly with the Torus in sector one if you encounter AI ship with no shield. Just let the “Anti-Ship Drone I” loose and he will get the job done for you.

If you’re not lucky enough to get a AI ship in the first few sectors, you can complete this achievement against a 1 shield ship in a asteroid field.

According to the wiki, you can use a boarding ship on a AI ship with doors connecting to every room. Since the ship will lose 1 hull each time a system is destroy, wait destroyed systems become activated again so you boarding drone take care of them. This might take awhile but will give you this achievement too.

The guns… They’ve stopped – Have 4 enemy systems or subsystems ionized at the same time while using the Engi Cruiser.

The Engi Cruiser third Achievement

This achievement can be easily complete when visiting a pulsar since system ionized by the pulsar count toward that achievement. Systems that have cool down periods such as cloaking, hacking, mind control and teleporters also count towards this achievement. So ionizing the missing system while these are recharging will get you this achievement.

If you are going to to it the hard way, which is only going with weapon, the Ion Blast II cannons with a  Ion Bomb or/and a Ion Blast I will get the job done to. You have to quickly switch between system while the shield are down, and you will get that achievement.

The Kestrel first layout

Achievement :

The United Federation – Have six unique aliens on the Kestrel Cruiser simultaneously.

Kestrel first achievement

I though that this would be the easiest one to get but I never manage to get more than 5 different aliens. Your human count has one and you need to get 5 other from the eight different species in the game.

The Slug and the Crystal alien are the hardest to get. Slug can be recruited in store only in the slug home nebula or with particular event like Slocknog. Getting the cristal are even harder, you can only get them by receive the stasis pod from the Empty Ship in Asteroids quest, and then have the pod activated in the Zoltan Research Facility quest. You can get the achievement without these two race though. Here how to get other race:

Engi : They can be found through event, by defeating slaver ship or paying for a slave from a slaver ship. The can be hired in shop, mostly in engi control sector/homeoworld, zoltan sector/homeworld and even in the mantis sector/homeworld.

Zoltan: Like the Engi they can be found through some event like by defeating slaver ship or paying for a slave from a slaver ship. The can be hired in shop, mostly in engi control sector/homeoworld, zoltan sector/homeworld but less frequently elsewhere.

Mantis: Like the Engi they can be found through some event like by defeating slaver ship or paying for a slave from a slaver ship. you can get one in some occasion if you side with the mantis crew in a event in a engi controlled/homeworld sector The can be hired in shop, mostly in engi control sector/homeoworld, mantis sector/homeworld but rarely elsewhere.

Rock: They can be found too through the slaver and various event. They can be found in store too but mostly rock sector/homeworld but rarely elsewhere.

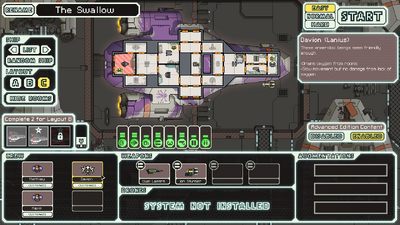
Lanius: You can get one when you encounter the “do you want our translator device ” event. It’s an event in abandoned sector that usually have Lanius there. You will encounter a Lanius ship that wants to trade scrap for fuel or drone or missile. There will be an option to inquire about their translator. Once you select it they will offer you 40 scrap for the “device” the device will end up being a Lanius name translator.
honestly I haven’t had the chance to find one except with that event or on the new Lanius ship or on a type C layout that sometime include Lanius crew member. However the wiki state that they can be found in store.

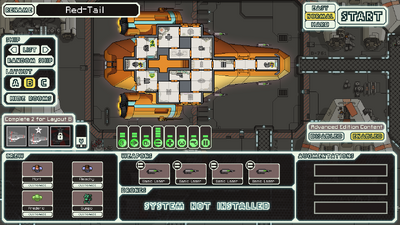
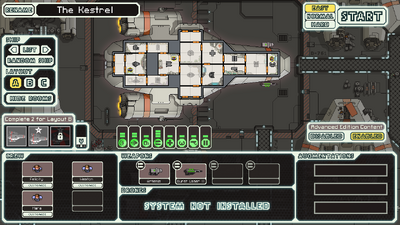
Note that This achievement is easier to complete using the Layout B (Red-Tail), as the starting crew includes three of the six required races.

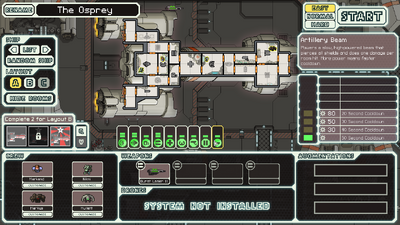
Full Arsenal – Have every system and subsystem installed on the Kestrel Cruiser at one time.

Kestrel second achievement

This was the first achievement I manage to get on this ship and probably the easiest to accomplish of the three. You simply need to have all the system installed on the ship for the standard edition or 3 out of the 5 missing system in the advance edition. The missing system are : Teleporter, Drone Control,Cloaking, Hacking, and Mind Control, costing respectively 75, 85 (or 75, depending on which free drone it comes with), 150, 80, and 75 scrap. For the standard edition you need Teleporter, Drone Control,Cloaking.

The cheapest you can get this achievement in the advance edition is to get the Teleporter, Drone Control (if it 75) and Mind Control. Note your need the Battery subsystem too in the advance edition to get this achievement.

Tough Little Ship – As the Kestrel Cruiser, repair back to full health when it only has 1 HP remaining.

Kestrel third achievement

Probably one of the hardest achievement to pull off but here how you can do it.

Note (from the wiki): For the game to recognize this achievement as earned, the player must have the Kestrel Cruiser down to one hull point before jumping to a store beacon, and then the ship must be fully repaired all at once. If the ship is not repaired all at once or if the Hull Repair drone is used instead of a store, the achievement will not be earned.

I’ve added the note so you know that the Hull Repair drone won’t cut it and that you need to have 1 hp before going to a store.

They are several way to do this achievement but you probably know that having 1 hull is never a good situation to be and the risk of receiving more that 1 hull damage while fighting might throw off you calculation to get to  hull while fighting. And there always the problem that you need scrap to heal you ship full (usually 58 or 87 scrap).

There actually 2 somewhat safe way to do that achievement:

1- The first way is to find a asteroid field near a store, fight any hostile ship that are there. Once they are taken care of, power down your ship shield and watch it to go down to 1 hull while you repair any system or subsystem hit. Then warp to the store and repair it full.

2- You can use a weapon that can target your ship like the fire bomb. you need to have enough missile though (around 1 per point, note you can always lets the fire propagate). When you are near a store and you have enough scrap and missile, target your ship with the bomb until your at 1 hull point then extinguish the fire and jump to the store to repair your ship.

We are doing a series of posts on FTL and  we hope you like them. If you want us to do more of this let us know in the comment or by mail at jack at onlinesgamestips.com

The Kestrel Cruiser is the starting ship of the game. It’s a pretty well balance ship that start with very powerful weapon. The burst laser II with 3 laser will take care of the early sector and the Artemis missile will help you remove those nasty shield. The burst laser II is so good that I never had to sell it or get rid of it in all my gameplay with this ship.

Layout A: The Kestrel Cruiser

The Kestrel first layout

Unlock: Unlocked by default

Starting weapons of that ship are some of the best in the game, you’ll probably will likely keep one or even both for the whole game. Burst Laser II is simply amazing, it’s only 2 power for 3 laser shot making it probably one of the best damage output for that amount of power. If you manage your way well this weapon should be to cruise through the early sector where enemy ship usually have 1 or no shield. The Artemis will help you to take out those shield, 1 power for 2 damage it’s quite good the only other missile using 1 power is the leto and it does only 1 damage.

One tactic with this ship is to add beam weapons, due to this ship’s high shield removal capabilities. Pike beam or halberd Beam will fit quite well on this ship. Another amazing setup I managed to get was to get two extra Burst Laser II (one found the other bought) and I cruised through the game with them. Weapon pre-igniter fit well on this ship, specially if you manage to get beam weapon, extra burst laser or better missile (Pegasu, etc)

Layout B: Red Tail

The Kestrel second layout

Unlock: Unlock that ship by earning two of the three Kestrel achievements.

The Basic Laser isn’t really good alone but four of them can make significant damage and will be very effective for early and even mid game. They are pretty good at leveling up your crewmember weapon skill. You will need replace these lasers with better lasers or support (bombs, missiles, beams). Already having a mantis might make it worthwhile to by a crew teleporter earlier than usual.

Layout C: The Swallow

The Kestrel Third layout

Unlock: Unlock that ship by surviving up to sector 8 with the Red tail (the kestrel layout B)

  • Default name: The Swallow
  • Starting Crew: 2 Human , 1 Lanius
  • Starting Weapons:
  • Starting Resources:
  • Slots: 4 Weapon, 2 Drone (requires system)

I haven’t had the chance to try this ship yet but it’s hacking system combine with the ion stunner make a good combo to prevent enemies from repairing their systems specially their shield, add the hacking stun augment and they won’t repair anything. It can be use to take down the Med bay or oxygen and prevent them from repairing them. I really like its layout, the oxygen system can be drain out of oxygen surrounding it forcing them to move elsewhere.


If you don’t have FTL: Faster Than Light on iPad click here and to buy it.

Source : The FTL Wiki Kestrel Page, The Wiki Ship Strategies and my tear and sweat trying to unlock those damn ship.