lanius achievement

Advanced Mastery

lanius achievement1 

Have Hacking, Mind Control and the Battery active at once.

The easiest achievement of the three, you need to have hacking, mind control and the battery installed on your ship and active. By active it’s mean that you need more than just having the 3 system, you need to use them all at the same time. That not really a problem, just don’t be surprise that you don’t get the achievement when you buy the last missing one.

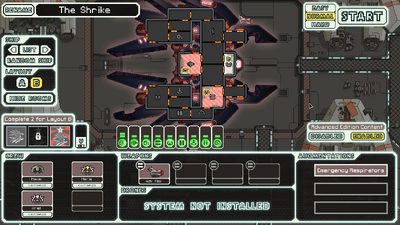
This achievement can only be miss if you’ve already installed all other systems and you don’t have room for the missing system.  It’s kind of hard to miss since both layout start with at least one of them (Kruos starts with Hacking &  The Shrike starts with Mind Control) and the battery is a subsystem so you should always have room for it.

Scrap Hoarder

scraphoarder 

Have at least 600 scrap in your ship storage.

Lanius are known for their love of scrap and this achievement show for it. You simply need to have only 600 of scrap in total. It must be unused scrap so it’s not has easy has it sound. The best way to achieve this achievement is on the easy difficulty because you get more scrap. Another nice augment you can add to increase your scrap receives it’s the Scrap Recovery Arm. Try boarding ship and clear the crew instead of destroying them since it’s give better reward.

If you are near the amount needed, you can liquefy your entire inventory until you have enough to reach the 600 scrap for the achievement. You can sell weapon, drone and augment to try to get to the magical amount.

Once you got this achievement, there is no valid reason to hold onto your scrap excepts maybe have the hell of a challenge for the later stage, so you could use your scrap with no consequence.

Loss of Cabin Pressure

lanius achievement3 

Get to sector 8 without your ship’s net oxygen levels exceeding 20 percent (starts after the first jump).

To achieve this you need to shoot down your oxygen to 20% or lower right at the beginning. If you have more than 20% after the first jump, you won’t get the achievement.

The probably easiest way to do this achievement is to shut down the O2 system and let the non Lanius crew die or respawn indefinitely with the clone bay. The other way is to open all the door and leave the air un the pilot cabin. The risk with this strategy is that if a ship hack one of your room it will close the door and let the air in again, potentially raising in over 20% or even worst a hacking drone can hack your door system and very quickly bring your oxygen level above 20%.

The game is winnable with 2 Lanius just stay away of event that might kill off your crew and the clone bay can’t resurrect them.

Note that there is currently a bug and this achievement cannot be achieve if you save the game and come back to it.

FTL: Lanius Cruiser

The Lanius cruiser is a ship only available in the advanced edition, it’s actually really simple to unlock compare to most ship. You receive it once you unlock 4 ships other than The Kestrel. 

Layout A

Unlock

Unlock 4 ships (Excluding The Kestrel) to unlock this ship.


Lanius Cruiser

  • Default name: Kruos
  • Starting Crew: 1 Human, 2 Lanius
  • Starting Augmentation:
  • Starting Weapons:
    • Chain Burst Laser
    • Ion Stunner
  • Starting Resources:
  • Slots: 4 Weapon, 2 Drone (requires system)
  • Clone Bay
  • Hacking


With 2 Lanius crew and one human, you can basically vent all air from the ship except where you human crew is and set yourself for one of the Lanius achievement. The starting weapon are the chain burst laser and the ion stunner, try to fire them together for maximum efficiency. It has hacking too but in the early sector you should use it in case where you know it’s going to be a hard fights like against those pesky anti-ship drone with ion.
Getting better weapon and teleportation is key, the starting weapon will have a hard time against ship with more shield. Teleportation is a great had to any ship with a Lanius crew member, with hacking you can hack O2 and then warp your 2 lanius there to finish the job. Hacking will protect the room giving your Lanius enough time to drain all O2 and to destroy the system. After that, since the O2 system is down, each time your lanius will step into a room it’s will quickly run out of oxygen making the other crew more vulnerable.

Try to avoid Abandoned sectors as they detract from your major advantage: not needing oxygen, but the blue options can often be worth it.

Layout B

Lanius Cruiser


Unlock

Earning two of the three Lanius Cruiser achievements will unlock Layout B.

Its name is a reference the real-life bird known for impaling its prey on thorns, the which is also the namesake of the Lanius themselves.
  • Default name: The Shrike
  • Starting Crew: 1 Engi, 2 Lanius
  • Starting Augmentation:
  • Starting Weapons:
    • Advanced Flak (special upgraded version, uses 1 less power, has a 2 second cooldown reduction)
  • Slots: 4 Weapon, 2 Drone (requires system)
  • Two Man Teleporter
  • Clone Bay
  • Mind Control

Your starting crew is similar to the previous layout, 2 Lanius and 1 Engi, the Engi will do the same work the human was doing in the previous layout. However this layout got mind control and a teleport which make it the perfect boarding ship. With mind control you can control an annoying enemy crew and let your Lanius finish the job. Use your advanced flask to clear out weapon or prevent the ship from running by taking out the piloting system. The only problem with that tactic is that after most fight your Lanius will be injured and you don’t start in many ways to heal them except waiting a few jumps or letting them die. The Reconstructive Teleportation augment is a must have in that case or get the healing bomb weapon. You can always change the clone bay for a med bay too. Focus on getting 2 Shield Layers early and hire additional crew members to man your other systems. Picking up a cloaking device is also a good Idea. You don’t need a lot of weapons to use effectively this ship but to beat the Rebel Flagship you either need bombs and missiles to disable their medbay or enough lasers to pierce their shields and attack the medbay once the medbay is down, and all the crew (except the one manning the laser) is dead Its easy going from there.

Is it warm in here?

Have your crew kill a burning enemy on their ship while using the Rock Cruiser.

rock 1st achievement

To earn this achievement the enemy killed must be standing still and not running to another tile when they are killed. Because of that, this achievement is really hard because enemies crew tend to run away from the room with fire when they have low hp.

I personally gained this achievement by killing a Rockman in a burning room. It is much easier than the other races, since they do not flee from fire at low HP anymore as of the advanced edition. Note that all other races will flee from a burning room at low HP like mindless monkey, regardless of whether there’s pizza (or boarders) in it or not.

They are another way to achieve this achievement, one of the easiest one is when fighting the Rebel Flagship (aka the Boss), ignite one of the weapon room where they can’t run and teleport a Rockman there. They can’t neither run or extinguish the fire, this will cook them in rather good pizza.

Another option is by locking the doors via hacking or lockdown (via Crystal crew or lock bomb) Keep them inside and warp your crew (preferably a Rockman) there to unlock the achievement while they are cooking inside the room unable to flee. Be careful though crystal crew are NOT fire immune.

This achievement can also be earned by a mind controlled enemy crew member killing a burning crewmate on-board their own ship.

Defense Drones Don’t Do D’anything!

While using the Rock Cruiser, destroy an enemy ship which has a defense drone deployed using only missiles.

rock achievement1

Another hard achievement, because you need to only use missiles during the whole battle, so hear me right on this NO OTHER WEAPON except for missiles can be used during the battle, regardless of whether or not they do damage.

If you fire Hacking or drone YOU WON’T get this achievement, ONLY MISSILES.

Note:

Crystal weapons count as missiles (they are considered projectiles and not lasers), and so they can be used to obtain the achievement.

Damage from asteroids and fire will not invalidate earning the achievement.

If you forgot what I said and fire a Hacking module or a laser weapon but the defense drone shoots them all down you can still get the achievement. (only if they don’t hit the ship shield or hull)

The enemy ship’s defense drone does not have to be active at when the ship is destroyed to earn the achievement, rather it just has to have one deployed at some point during the fight.

This achievement cannot be earned in the final boss fight, because the Rebel Flagship‘s because the second phase fight (where the drone is deployed) does not end in the ship’s destruction.

I don’t know if teleporting prevent this achievement, you can always try it and teleport on the ship to take out drone control and then let the missiles finish the job.

How to beat it:

Easy way, get the a Defense Scrambler augment and fire only missiles the whole fight and you’re good to go.

Hard way, you don’t have the Defense Scrambler augment, fire 2 missiles at the same time and aim for the drone system. The first missile will be taken down but the second one will probably go through taking down their drone allowing your next missiles volley to wreck havoc their ship. Not that swarm missile can be a great weapon to had to your arsenal to complete this achievement.

Ancestry

Find the secret sector with the Rock Cruiser.

rock achievement3

Probably the hardest ship achievement in the game because it’s require you to complete 2 quest and be in the right sector (rock homeworld) to be able to go the the crystal homeworld.

Luckily, you can use the Rock Cruiser type C in the Advanced Edition which starts with a single Crystal aboard the ship. This allow you to skip the 2 first event.

This achievement is so hard that I haven’t been able to achieve it yet, but here some info I’ve got from the wiki and link to the wiki to succeed this achievement.

From the wiki:

To get to the secret sector (Hidden Crystal Worlds), the player must first encounter the Dense Asteroid Field Distress Call event and acquire the Damaged Stasis Pod. Then, arrival at a Zoltan Research Facility which will give a blue event option asking the Zoltan if they can fix it. Once the pod is fixed, a Crystal will be revitalized and join the ship’s crew. If they are kept alive and theAncient Device is encountered in the Rock Homeworlds, another blue event option will be shown where they can reactivate the device, thereby teleporting the ship into the secret sector.

A significant amount of luck is required to unlock this achievement.

Here a quick summary of how to obtain the Crystal ship

  • Obtain the Damaged Stasis Pod augment – In Pirate Controlled Sector, Engi Controlled Sector/Homeworlds, and Rock Controlled Sector/Homeworlds
    • Occurs at a Normal Distress Beacon
    • Choose to
      1. Search for the Ship or (Rock Plating) Make a thorough search for the ship without fear of stray asteroids
      2. Then Grab the stasis chamber
  • Talk to the Zoltans at the Zoltan Research Facility – In Engi Controlled Sector/Homeworlds and Zoltan Controlled Sector/Homeworlds
    • Occurs at a Normal Beacon
    • Choose to
      1. (Damaged Stasis Pod) Ask if they can fix this
  • Find the Ancient Device – In Rock Homeworlds
    • Occurs at a Normal Beacon (NOTE: As of v.1.03.3, the Ancient Device event occurs at a Quest Beacon instead of a Normal Beacon).
    • Choose to
      1. (Crystal Crew) Reactivate it
  • Go to the Hidden Crystal Worlds Marker
    • Occurs at a Quest Beacon

More at http://ftl.wikia.com/wiki/Ancestry

The rock cruiser is probably one of the hardest to get it’s achievement. However it’s a great ship and it’s actually the first ship I managed to beat the game with (in easy mode). Rock plating is pretty useful and the Rockman are pretty good at everything except running. The make the best pilot, they make great fighters due to their high health, they great at repairing stuff and clearing out fire thanks fire immunity.

Layout A

Rock Cruiser Layout A

Unlock

See the Rock war vessel encounter.
Alternatively, defeat The Rebel Flagship with the Slug cruiser.

The main problem with this ship is that your weapon all use missiles, you will have no problem clearing ship in the initial since your missiles ignore shield, there’s rarely any defense drone and they all have low evasion. However your missiles supply will drain like crazy so try to take advantage of the 4 damage hull missile when firing on a empty system. Get a weapon that don’t require ammo has soon has possible or crew teleportation can be a good alternative, shoot down there weapon system then teleport to finish the job. This ship is probably the best to achieve the Defense Drones Don’t Do D’anything! achievement.


Layout B

Rock Cruiser Layout B

Unlock : Earning two of the three Rock Cruiser achievements will unlock Layout B.

The Shivan (Rock Cruiser Layout B) starts without a door system, requiring 60 scrap to install. It is the only ship which does not have external doors, preventing any sections from being vented to space except via a hull breach. If in advanced edition, Lanius crew can be used to suck air out of rooms, even if they are not in that room, also the Fire Suppression augment works wonders as it helps put out fires.

This ship is a great boarding ship because it’s has firebomb and your crew (rockman) are immune to fire, it’s make it easy to blast a room then warp in your crew to finish the job in the fire. If your enemies aren’t rock man, they will take damage from the fire while you fight them, as well as the system in the room. Systems cannot be repaired if they are on fire, and fires cannot be put out if your crew is there. Medbay should be your first priority, weapon or piloting second depending if they are trying to flee.

The name "Shivan" combined with the color scheme of Layout B is a reference to an alien race of the same name in the game Descent: Freespace.

Layout C

Rock Cruiser Layout C

Unlock

Reaching sector 8 with the Rock Cruiser B with Advanced Mode enabled will unlock layout C

This layout start with great weapon and a Crystal crewmember. The Heavy Crystal and the Swarm missiles will make early sectors quite easy, as the crystal mark ignore level 1 shield and swarm will help you take out any extra shield. You should probably focus on your defense first before trying to get new weapon. The greatest asset of the ship is the crystal crewmember, it will help you unlock the crystal cruiser skipping the need to do 2 extra quest before finding the crystal sector. Crystal man are great at taking care of boarder and boarding other ship with it’s lockdown ability preventing enemy crew from leaving the room and other from entering it. I had paired him with a Mantis with great result, even on the final ship. Pairing him with a Lanius can make great synergy too.

rock layout 3

The Slug Cruiser achievements are pretty easy to do compare to other ship. I’ve been lucky and managed to grab 2 of them in my first try and got the third one (Home sweet home) after because I wasn’t able to go to two nebula sector.

We’re in position!

While using the Slug Cruiser, have vision of every room on the enemy ship without functioning sensors.

slug achievement 1

To earn this achievement it’s probably better to have a teleporter, once you board with some of your (Slugs) crew you should manage to see the whole ship.

Earning this achievement requires a teleporter, as the player must have some of their crew (most likely Slugs) board an enemy ship to see the inside of it without functioning sensors.

A way to accomplish this is by upgrading to a level 2+ teleporter then teleport your two slug crew onto an automated scout ship. With the upgraded teleporter, there’s just enough time to teleport them out before they suffocate.

Note, many of the early-game pirate or rebel ships have layouts that can be completely viewed by only two carefully-placed slugs.

The achievement can still be earned if the sensor system is installed on the Slug Cruiser, but the system must be either destroyed, fully ionized, hacked, or incapacitated due to a nebula.

Note that hacking, boarding drone and mind controlled crew can help you achieve this achievement too.

Home Sweet Home

Jump to 30 nebula locations before sector 8.

slug achievement 2

This achievement is probably the easiest if the 3, it’s mostly require luck that you have 2 sector that are nebula and you should probably be fine. Since nebulas  (even a whole nebula sector) slow down the Rebel Fleet, you will be able to visit more beacon that in an usual sector. You just need your 30 jump before sector 8 and you’re golden.

Disintegration Ray

While using the Slug Cruiser, kill 3 enemy crew members with one shot from the Anti-Bio Beam.

slug achievement 3

I managed to earn this achievement by putting on fire some a room that and they were no rock crew. All the enemies crew went to the room to take the fire out, but once they start having low hp they leave the room, at this moment I fired my anti-bio beam and killed 3 of them.

Side Note from the wiki:

There is supposedly a bug that count your own crew when you killed them. The exploit is to send two of you crew to fight and when they are low in health fire the beam.

Note: Killing System Repair Drones or Anti-Personnel Drones also counts to the limit of enemy crew members killed. I don’t really understand why that work since they are robot not bio unit. Give it a try and if it work let me know.

At first I hated this ship but after a play through I actually liked it, I managed to get 2 achievements and kill the boss (easy difficulty) the first time I’ve played it. We will talk about the achievement in a next post but now let’s talk about how to play each layout.

Layout A

Slug Layout A


Unlock

See the Slug Home Nebula Surrender random event.
Alternatively, defeat The Rebel Flagship with the Mantis Cruiser.

What I didn’t like about that ship was the starting weapon I had a hard time of making the Anti-Bio Beam work, I sometime ended up destroying the ship before killing the crew. But when it’s work you get extra scrap and sometime you might even receive a extra crew or weapon. The beam take 2 shot kill most crew member, 3 if the member is a Rockman or Crystal.

Note that there are no sensors aboard this ship. But since Slugs can see the rooms they are adjacent to, and the locations of enemies onboard their vessel it’s shouldn’t be a problem compare to the Mantis cruiser layout A.

As for the flagship: board the missiles, hack the shields, mind control the pilot, to nullify their dodge chance, and the crew members can’t do anything about it, since hacking disables their doors, thus it’ll take time for them to get another pilot. Be sure to also take down their shields with something like a breach bomb, which will their ship rendered useless ,(this also works for difficult mode, so you’ll slow them from repairing the missiles/lasers)

Layout B

Slug Layout B

Unlock

Earning two of the three Slug Cruiser achievements will unlock Layout B.

The Stormwalker (Slug Cruiser Layout B) starts with a teleporter but lacks a medbay, resulting in reliance on the Healing Burst to heal crew members at the beginning. Grabbing either reconstructive teleport [LINK] or a Med bay will help you save on those precious missile. (Considering that the starting weapon only use missile, no beam, no laser…)

Like the initial Slug Cruiser, the layout B still lack sensor. That shouldn’t be too much of a problem though because your slug crew will be able to see boarders and the life form on the ship.

Side note: the layout of this ship allows you to remove oxygen from most of it, making boarders less of a problem.

I’ve really hit the mark with this ship, I was lucky enough to get a med bay really quickly (saving on those missile) and I’ve went through an abandoned sector and managed to grab two Lanius. And the rest is history. Considering that on this ship it’s pretty easy to clear the O2 from it because there so many door, you asphyxiate boarders really quickly and your Lanius force them to fight instead of trying to go through the door. Boarding is a charm, two Lanius quickly drain a room of oxygen, forcing enemy crew to leave the room, combine with the healing burst, your Lanius shouldn’t have any problem. For the final boss I had installed cloaking and Drone (a defense drone to block the hacking and a combat drone). Hacking can be good too, you can hack the med bay and send your Lanius there.

Layout C

Slug Layout C

Unlock

Reaching sector 8 with the Slug Cruiser B on any difficulty with Advanced Edition Content enabled will unlock layout C.

The Ariolimax starts with Hacking and Mind Control, making it effective at disrupting an enemy ship. As a side note, be aware that its Medbay only has one space, should you choose to replace the Cloning bay with it (don’t do it it’s a bad idea…) It’s start with a great gun too, the Chain Burst Laser can be pretty efficient even early 2 shield should be a problem, hacking will help you there.

Using the combination of the hacking on the oxygen system and mind control on the crew trying to repair it. You can kill a whole ship by asphyxiation, and get better reward (you really need them in normal & hard).

Starting with a level 2 Doors subsystem and a Mind Control, this ship is quite strong against early boarding parties. Be careful, though, as Mind-controlled enemies can pass through your doors just as if they were friends!

You can upgrade this ship in many ways, Drones and Beam Weapons work really well with hacking, as Hacking help you remove enemy shields. Burst laser can go well too with hacking since you can hack the engine or shield and blast the ship with your laser.

Bombs have great synergy to help drain/deny Oxygen from your foes, drop a bomb on oxygen and lock it with hacking and they are done. Teleporting can be a great addition especially if you can get your hand on some Lanius, combine with mind control and hacking, teleporting a Lanius on the ship will accelerates the de-oxygenation process. Teleporting work with other race to because of mind control giving you an extra member on the enemy ship to fight with you and hacking can help you lock a room, preventing the enemy from escaping or entering.

The only problem is its  low shield & low engine at the beginning, everything will it you. Missile weapons are a pain, beam weapon with decent ion or laser can be a problem too. Drone can be very annoying too.


Take no prisoners!

Kill the crew of 20 ships by sector 6 in the Mantis Cruiser.

Mantis achievement1

This one is probably the easiest achievements to get. You need to kill the entire enemy crew of each ship to be killed and leaves the enemy ship intact. Destroying to ship with crew inside doesn’t count.

"By sector 6" means the crews have to be killed by the end of the sixth sector, not by the beginning of it.

Avast, ye scurvy dogs! 

Kill 5 enemy crew in a fight without taking hull damage or losing a crew member while using the Mantis Cruiser.

Mantis achievement2

The easiest way to do that achievement in when you encounter a ship with Clone Bay system. Disable their weapon or if you have enough shield to prevent them from doing you damage. Board the ship and kill everyone with your mantis. wait for them to re-spawn and kill them until you get the 5 kill.

Another way to get that achievement it’s when people board you at the same time you are attack by a ship event though there no teleport on the ship. Finish the boarder then board the ship. If you’re lucky like me there will be 3 boarder and 2 on the ship.

Besides a fight against an enemy ship, this achievement can be won from a shipless boarding event with five or more attackers.

Note that Boarding and Anti-Personnel drones can be used to help unlock this achievement.

Battle Royale 

While using the Mantis Cruiser, kill the last enemy with your last crew member on their ship.

Mantis achievement3

This is the hardest of the three mantis achievement to get. I manage to get it with the layout B. I’ve sent my 2 mantis while fighting a nearby sun (not recommended) and their crew was harm by the fire, but one of my mantis had fallen in combat, the other one manage to kill the last one while having just a few hp left.

Note that this achievement can be unlocked with the assistance of a Boarding drone, has long it doesn’t get the kill. The final blow must be dealt by the crew member sent to board the enemy ship.

You can cheat to achieve this one. In the first sector board an enemy ship and kill all the crew except one and bring the last crew to almost no health, then teleport back your crew back. Then you put one sole crew member in the teleporter and kill your other crew members with asphyxiation. Finish the last enemy off with your remaining crew member.

The Mantis Cruiser follow the same theme has the race that designed it, an efficient boarding ship (specially the layout B and C with 4 boarder teleport) that tend to lack fire power at the beginning. Unmanned ship might be a problem, but remember that with a level 2 teleport the teleport will be up just in time before your border die of asphyxia.

Layout A

The Mantis Cruiser

Unlock

See Legendary Thief KazaaakplethKilik random event.
Alternatively, defeat The Rebel Flagship with the Zoltan Cruiser.

The Mantis Cruiser layout An is one of the few ships that have no starting Sensors on board, which can be annoying when boarding since you don’t see what is in the other ship. You can buy a Sensor system in a store or try to grab a slug crew since they detect life form that are on the other ship.

This ship is quite a force to recon with, 3 mantis with a teleporter at the beginnings make taking out most ship with boarding easy for the first few sector, giving you extra scrap to later buy weapon to compliment this ship strength. AI ship can be take out with a small bomb on the shield and basic laser to finish the job, Zoltan supershield can be taken down by the basic laser and then precede has normal.

The small bomb can be quite useful to take out the med bay, clonebay or piloting if they are trying to run. In other case weapon are a great target since it will prevent the enemies from damaging you.

Most bombs are great addition to this ship, ion weapon too to take down annoying subsystem. You can good offensive weapon in case you’re face with rebel trying to run away, AI ship with too much shield. Drone can be a great add too to minimize damage to your ship via defense drone or to send boarding drone with your boarding crew. Mind control can be cool too, adding an extra crew fighting for you, hacking can be useful too, disable weapon or hack the med bay which will reverse the effect of the medbay.

Layout B

mantis layout B

Unlock

Earning two of the three Mantis Cruiser achievements will unlock Layout B.

This ship start with something really awesome, a four man crew teleporter. once you get enough member you can board a whole ship with 4 crew.

Early game : This ship start with 2 shields and a defense drone, but has no weapon, the piloting and engines only have one bar. It’s unlikely that many enemies early on will be able to pierce your shield and you can always pop a defense drone vs a ship with missiles weapon. The main issues are AI ship and zoltan-shielded ship. Taking AI ship them on with boarding drones are impractical and not worth it early on, unless it is the AI variant with doors linking the 5 rooms. However you can get the teleport level 2 and jump your crew on the ship, the teleporter should recharge before your crew health is down to 0. Repeat until the ship has one bar and send the boarding drone then. AI system will slowly repair and your drone will takes them down and give the final blow. For Zoltan sheild you really need to get weapon to remove the shield or use a zoltan shield bypass augment.

Mid-Late game: You should rise your engine and piloting, grab some decent crew, mantis and rock for the teleporter and other to man your ship. Bomb are a nice addition to suppress weapon or med bay that can cause trouble, have a least some weapon that can takes care of the zoltan shield and to finish those AI ship without sending a boarding drone. Reconstructive teleport and shield bypass augment can really make your boarding crew your ultimate weapon. Just don’t forget your 4 crew members on a fleeing ship or shoot them with your cannons.

Layout C

The Mantis Cruiser

Unlock

Reaching Sector 8 with the Mantis Cruiser B and Advanced Edition Content enabled will unlock layout C.

Another Mantis ship with a four man teleporter, the main difference here is you have a clone bay instead of a medbay, some weapon, a Lanius in your crew and only one shield.

Like the layout B you might have some problem early game with A.I. Ships and ship with assault drone (anti-ship & beam drone). I particularly had problems with ship with ion + beam weapon or beam drone at the beginning.

Luckily your Lanius can board A.I. Ships without a problem and slowly destroy their system. Once the A.I. Ships is destroy your Lanius will be reconstructed in the clone bay. Lanius are excellent boarder, you can wait for your lock bomb & stun bomb to charge then send the lanius in the oxygen room and lock him there alone. By the time the lock is done your Lanius will have emptied the room of oxygen and most crew will be 2 stupid to go fight him. Once the oxygen is out, each room you walk in will be emptied of oxygen forcing them to die of slow death. You can stun them once they are in a room without oxygen to force them to die of asphyxia. This ships will have problems against Zoltan Shields if you don’t get Zoltan Shield Bypass or some weapon to destroy it. Another notable augment to have Reconstructive Teleport & backup DNA, especially Reconstructive Teleport with a clone bay.

Bird of Prey

Destroy a ship at full health during a single cloak in the Stealth Cruiser.

The Stealth Cruiser: Bird of Prey Achievement 

To earn this achievement, the ship must remain cloaked from the start of the volley until the battle is over and the after-battle text pops up.

This achievement is easier to get done in the first two sectors on the easy difficulty with a level 2 cloak (that is due to the 5-hull points drones only appearing on this difficulty). Charge the weapon, cloak and fire lasers and align the beam to cross the pilot room (and the ones beside it). When I managed to do it I had the Weapon  pre-igniter, Pegasus missile, flask and dual laser. Cloak when starting the fight, launch the Pegasus on the shield and then aim the pilot with dual laser and flask (or a large room with the flask). Level three cloak should enable the dual laser to charge again before the cloaking end. You can probably do the same thing I did with the glaive beam remember if it did not work it’s maybe that the cloak finished before the after-battle text pops up.

Note: Anti-Ship drones can be used to help unlock this achievement too. 

Phase Shift

In the Stealth Cruiser, avoid 9 points of damage during a single cloak.

The Stealth Cruiser: Tactical Approach Achievement

You can manage to get this achievement can be while fighting the Rebel Flagship’s third form.  Simply cloak during the Power Surge attack, which should deal out more than nine damage.

It is also possible to unlock in an asteroid field, if you can stay cloaked long enough.

Tactical Approach

In the Stealth Cruiser, get to sector 8 without jumping to a beacon with an environmental danger.

The Stealth Cruiser: Phase shift Achievement

This achievement is the third but is actually the easiest to earn as long you keep the Long-Range Scanners augmentation and are a bit lucky. Note that Neither Rebel-Controlled beacons nor Nebulae nor Anti-Ship Batteries count as environmental hazards, but Plasma Storms, Asteroid Fields, Red-Giant Stars and Pulsars do.

Sometimes due to beacon placement you will be force to go to an environmental hazard if there is no alternate route.

We are doing a series of posts on FTL and  we hope you like them. If you want us to do more of this let us know in the comment or by mail at jack at onlinesgamestips.com

The stealth cruiser is a pretty fun ship to play with. While it lack shield its start with cloaking to compensate and if you manage it well it can have devastating effect. You can always buy the shield at a shop for 125 scrap.

Layout A

The Stealth Cruiser

Unlock:

Defeat the right rebel in the Engi Fleet Discussion random event and head to the final quest marker and defeat the Mantis ship. The engi will deliver you the tech to build a new ship and unlock the stealth cruiser. For more info see the Engi Fleet Discussion random event.

Alternatively, if you defeat The Rebel Flagship with the Rock Cruiser that ship will be unlock.

I had a hard time figuring out this ship when I started. When you look closely this ship is all about timing. The lack of shield force you to be imaginative with your cloak and you weapon shots must be timed to maximum efficiency. When encountering a enemies. Either cloak right away to let your weapon charge or wait for him to shoot and at that exact moment cloak to dodge the shoot. With the dual beam take down the shield and let you mini beam either disable the weapon or drone. Upgrade you should try to get are the shield (sold in some stores for 125 scrap), a weapon to take down shield/weapon (bomb or missile) and upgrade cloak.

Layout B

The Stealth Cruiser

Unlock:  Unlock that ship by earning two of the three stealth cruiser achievements.

This layout is super hard at the beginning, no shield, probably the best weapon in the game but it takes 25 second to charge and if your weapon system is hit it will completely discharges leaving you completely vulnerable (you basically have to run or you’re dead at that point). Drone are specially a problem, the beam drone is the worst it will tear your ship apart while you are try to charge your beam. Once the Glaive Beam is charge you will probably tear down most ship in the first 3-4 sector. It can do 9-15 damage (3 damage per room × 3-5 rooms) in a single shot (depending on the enemy ship layout) and has a good chance of lighting enemy rooms on fire. For the first few sector here what I did: first avoid asteroid field and probably ion storm too. When fighting other ship, hopefully they don’t have any anti-ship or beam drone, these can really be problematic. If they have boarder or drone (with anti-ship only) or hacking, it’s probably better to cloak right away. If they don’t have any of the 3 systems mention, wait for the first volley to be launch and cloak that should give enough time for the Glaive Beam to be completely charged and tear them apart.  Hacking can be very useful to drain the shield, if you can get the weapon pre-igniter do it , it will give you an insane advantage and probably help you stream through the game without much worry for the first sector.

Layout C

The Stealth Cruiser

Unlock: Get to sector 8 with layout B.

That layout is actually really weird, there no shield likes the other Stealth Cruiser but there no cloak too. So what the point of this layout ? It as amore power efficient version of the Shield Overcharger, it’s also the only non-engi ship to possess a 3 space drone bay, giving greater versatility for Drones to be used, either defensively or offensively and finally it has a slightly improved version of the Laser Charger (S).

With this specialized Shield Overcharger and 2 Defense Drones Mark II (for a total of 6 power – the max) you could almost render a normal shield system useless – granting near-invulnerability to hacking, (non event) boarding, and a large number of projectiles, provided your drones are up as soon as battle starts and enemy weapon systems are targeted first. I would still try to grab the shield sub system since it’s doesn’t discharge when they attack you with beam weapon.

Cloaking it a great asset too, it can give you the time to put you drone up, let the Shield Overcharger  build up the super shield and let the Laser charger to charge.

As this build is so drone-heavy, acquire a Drone Recovery Arm – and your defences become free! It can easily be swapped out towards the end of the game (Sector 6+) when you should have stockpiled a large number of drones.